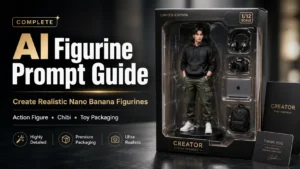
From blister packs to chibi figures: the formula, the fixes, and the prompts that make your AI figurine look store-bought.
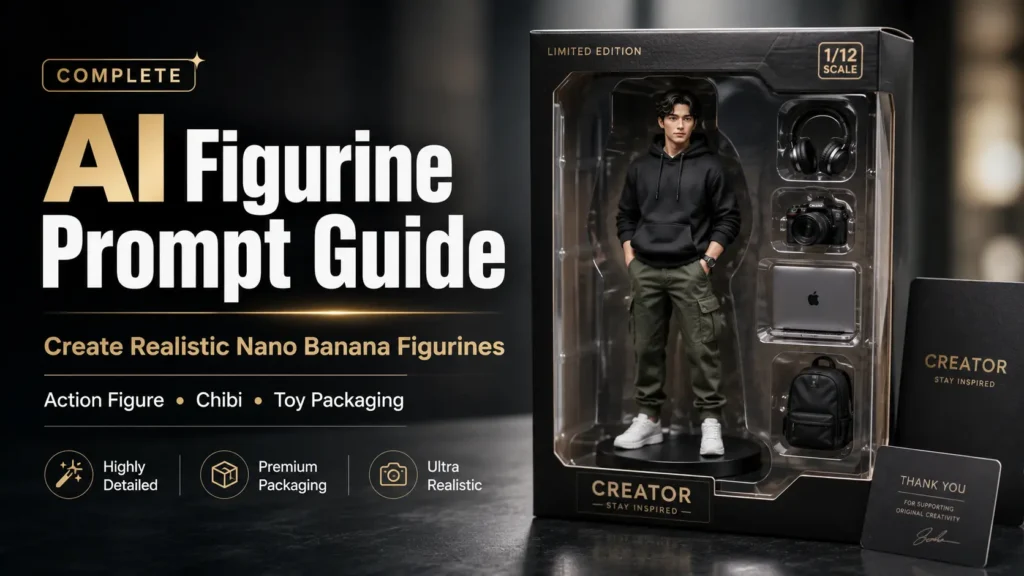
If you’ve tried the “turn me into a figurine” trend, you’ve probably run into the same problem twice: the first result looks close, and the second attempt somehow looks worse. Hands blur together. The plastic looks like wax. The packaging text comes out as gibberish. The body ends up shaped like a bobblehead instead of a real collectible.
That’s not bad luck — it’s a missing prompt structure. Most “figurine prompt” articles just hand you a list of ten prompts and stop there. None of them explain why some figures look like a $40 collectible and others look like a melted toy from a gas station machine.
This guide is built to fix that gap: a working formula, real weak-vs-improved comparisons, and prompt variations for the specific situations people actually looking for — action figures, chibi style, toy packaging, pets, couples, and even figurines with no reference photo at all.
Quick Prompt: A Ready-to-Use AI Figurine Prompt
If you just want something that works right now, copy this into Gemini (Nano Banana Pro) with a clear reference photo attached:
Using the uploaded photo as the exact likeness reference, create a photorealistic 1:6 scale collectible figure of this person. Matte-primed PVC material with subtle seam lines at the shoulders, elbows, and knees, glossy finish only on the eyes. Standing pose, relaxed posture, one hand on hip. Display on a simple round base with a small nameplate reading “[NAME].” Soft studio key light from the upper left, subtle rim light, soft contact shadow, plain neutral gray background. Five fingers per hand, natural proportions, accurate facial likeness.
That’s a complete, single-shot prompt — no packaging, no accessories, just a clean figure. Keep reading for the full formula, the packaging and chibi variations, and how to fix the specific thing that’s going wrong in your version.
Why Most AI Figurine Prompts Fall Flat
Before the prompts, it helps to understand what the model is actually doing. It isn’t sculpting a 3D object and photographing it — it’s predicting pixels that look like a photographed object. That distinction explains almost every common failure:
- Proportions collapse when you don’t specify a scale. Left alone, the model defaults to “cute toy” proportions — bigger head, shorter limbs — even when you wanted a realistic figure.
- Material looks fake when you describe the figure but never describe the surface. Real figurines have a matte primer coat, glossy accents only on eyes and buckles, and faint mold seam lines. “Plastic” alone doesn’t get you there.
- Packaging text garbles when there’s too much of it, or it’s buried mid-sentence instead of isolated and short. Nano Banana Pro is genuinely strong at text rendering, but it rewards short, clearly flagged text over paragraphs.
- Lighting looks flat when you only say “studio lighting.” Real product photography has a key light, a rim light, and a soft shadow — one vague phrase gives you a generic, CGI-looking result.
Once you build around these four failure points instead of generic style words, results move from “meme” to “product shot.”
The AI Figurine Prompt Formula
Here’s the structure worth memorizing. Every strong figurine prompt fills in these six slots, in roughly this order:
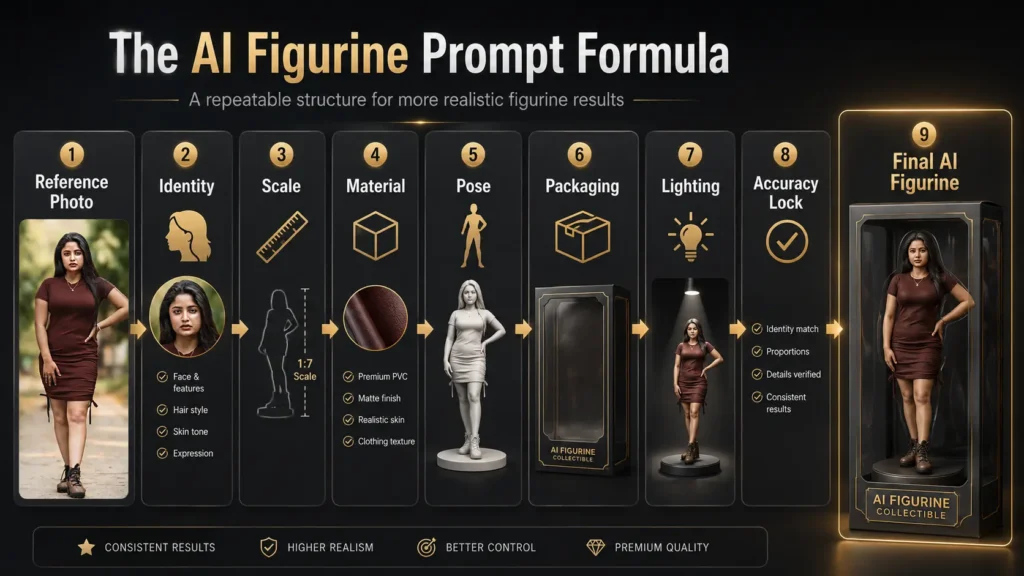
[Likeness instruction] + [Scale & material] + [Pose] + [Packaging or base] + [Lighting & background] + [Accuracy safeguards]
- Likeness instruction — what to preserve from the reference photo (face shape, hairstyle, skin tone)
- Scale & material — a real ratio (1:6, 1:7, 1:12) plus a named finish (matte-primed PVC, glossy vinyl, resin)
- Pose — a specific stance, not left to chance
- Packaging or base — blister pack, window box, display case, or a simple labeled stand
- Lighting & background — direction of the key light, a rim light, and a named background tone
- Accuracy safeguards — a short line locking in hands and facial likeness, since these are where generation most often drifts
If a prompt you’re writing is missing more than one of these slots, that’s usually exactly where the output is going to fail.
Weak Prompt vs. Improved Prompt
Seeing the difference side by side makes the formula click faster than any explanation.
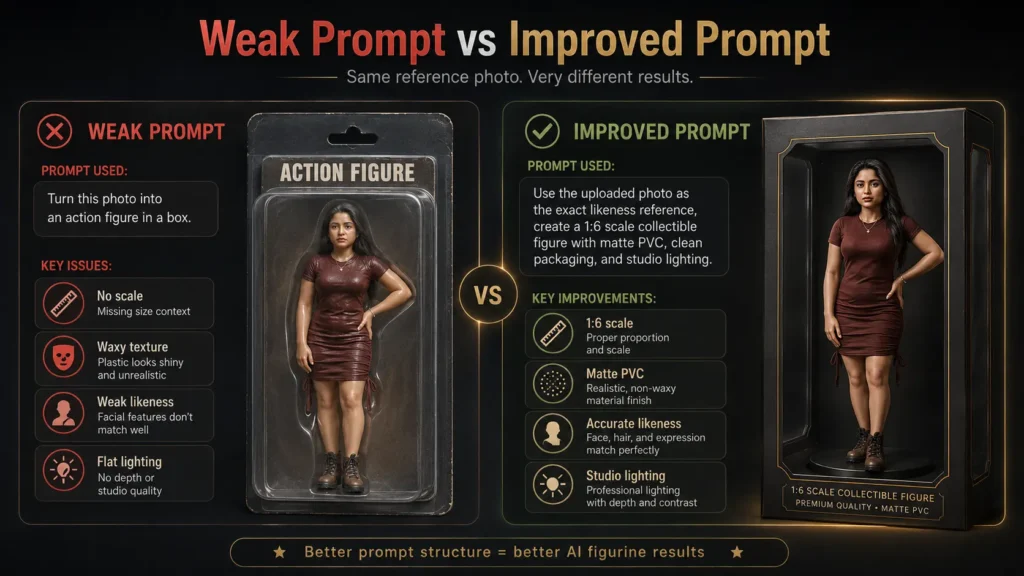
Example 1: Basic Figurine
Weak: “Turn this photo into an action figure in a box.”
Improved:
Using the uploaded photo as the exact likeness reference, create a 1:6 scale action figure with matte-primed PVC material and visible joint seams. Package in a clear blister pack on a cardboard backer card reading “[NAME]” at the top. Soft studio lighting from the upper left with a rim light and contact shadow. Five fingers per hand, natural proportions.
The weak version leaves scale, material, lighting, and text all up to the model’s defaults — which is exactly why identical-looking, generic results flood social media.
Example 2: Chibi Style
Weak: “Make me into a cute chibi figure.”
Improved:
Using the uploaded photo as the likeness reference, create a 3D chibi-style figurine with a roughly 1:2 head-to-body ratio, small rounded body, and simplified but recognizable facial features matching the photo. Matte vinyl material, no visible seams. Display on a small round base labeled “[NAME]” in a rounded sans-serif font. Bright, even studio lighting, soft pastel background.
Without a stated head-to-body ratio, “cute chibi” can mean anything from a slight stylization to an unrecognizable blob — the ratio is what actually controls the look.
Example 3: Pet Figurine
Weak: “Turn my dog into a figurine.”
Improved:
Using the uploaded photo as the reference, create a photorealistic 1:6 scale figurine of this dog in a natural sitting pose. Matte-primed material with a sculpted fur texture (not photographic fur — it should read as a toy surface). Mount on a round display base with an engraved nameplate reading “[NAME].” Soft studio lighting from the upper left, gentle contact shadow, neutral background, no packaging.
The key fix here is “sculpted fur texture” — without it, the model often keeps the fur photorealistic, which breaks the toy illusion entirely.
How This Formula Was Put Together (And Its Limits)
This formula comes from two things: how Nano Banana Pro’s underlying model is documented to actually work (it’s an instruction-following, “reasoning-first” model rather than a purely aesthetic one, which is why explicit, literal instructions consistently outperform vague style words), and cross-checking that against patterns widely reported by other creators working with this trend — things like text garbling on long taglines, and proportion drift when scale isn’t stated.
That means the formula is a strong starting structure, not a guarantee of a specific result. You may still need one or two regenerations to land a clean version, even with a complete prompt. If a technique in this guide stops working as Google updates the model, that’s expected — treat this as a framework to adapt, not a fixed recipe.
Why Gemini Sometimes Refuses to Generate Your Figurine
This is the part most figurine-prompt articles skip entirely, and it’s one of the most common frustrations people run into.
Since early 2024, Gemini has restricted generating photorealistic images of real, identifiable people, and Google tightened this further with safety updates through 2026 — the restriction covers things like face-swapping, outfit-swapping on real photos, and content involving public figures. A figurine prompt built from your own uploaded photo generally works because you’re stylizing your own likeness into a toy, not creating a deceptive photorealistic image of someone else — but if a prompt reads as trying to create a hyper-realistic, unaltered photo of a real person (rather than an obviously stylized collectible), it’s more likely to get flagged.
If your prompt gets refused for no obvious reason, a few things reportedly help:
- Emphasize the “toy” framing explicitly — words like “collectible figure,” “sculpted,” and “toy packaging” signal stylization rather than a realistic photo.
- Avoid combining a real person’s photo with a named public figure or celebrity in the same prompt.
- Try again after simplifying the prompt — some users report that overly long, multi-clause prompts are more likely to trip conservative safety filters than shorter, clearer ones, even when the content itself is harmless.
It’s also worth knowing that free and paid tiers have different generation limits.
Ready-to-Use Prompt Variations
Fill in the bracketed sections. Each one follows the six-slot formula above.
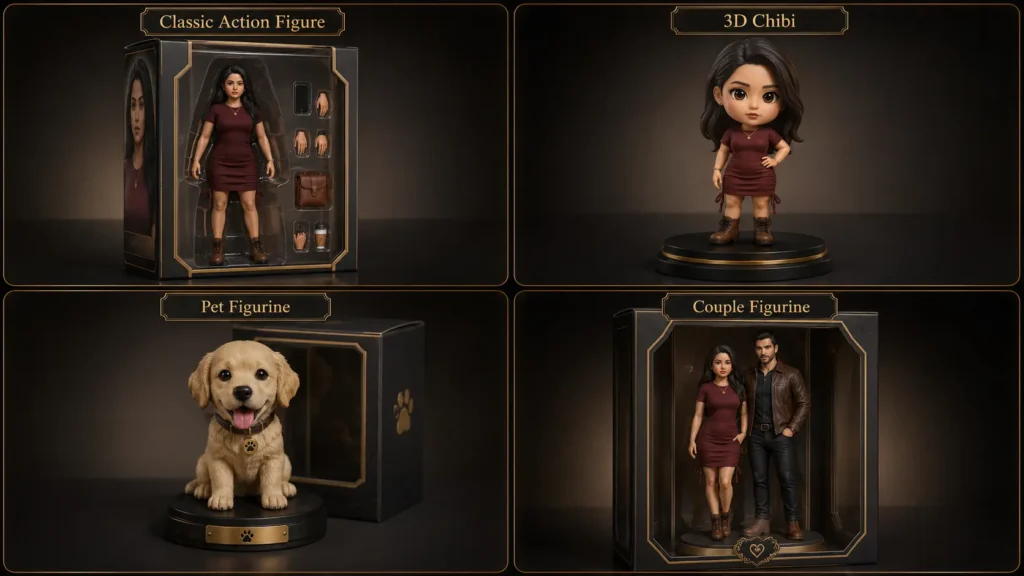
1. Classic Blister-Pack Action Figure
Using the uploaded photo as the exact likeness reference, create a photorealistic 1:6 scale action figure of this person. Matte-primed PVC material, visible joint seams at the shoulders, elbows, and knees, slightly glossy finish on the eyes only. Package standing upright in a clear plastic blister pack mounted on a cardboard backer card reading “[NAME]” as the header and “[TAGLINE]” as a smaller subheading. Include [2–3 accessories] in separate molded compartments beside the figure. Soft studio key light from the upper left, subtle rim light, soft contact shadow, neutral gray background. Five fingers per hand, natural proportions.
2. Premium Window-Box Collectible
Using the uploaded photo as the exact likeness reference, create a 1:7 scale premium collectible figure. Matte-primed resin finish with subtle seam lines, gloss reserved for the eyes and any metallic accessories. Package in a rigid window box with a die-cut acetate window, soft-touch matte exterior, and a foil-stamped logo reading “[STUDIO NAME]” in the corner. Small printed text along the bottom reading “Limited Edition — No. [NUMBER]/500.” Moody, directional product lighting. Five fingers per hand, accurate facial likeness.
3. 3D Chibi Style
Using the uploaded photo as the likeness reference, create a 3D chibi-style figurine with a 1:2 head-to-body ratio, small rounded body, and simplified but recognizable facial features. Matte vinyl material, no visible seams. Round base labeled “[NAME]” in a rounded sans-serif font. Bright, even studio lighting, soft pastel background.
4. Toy Packaging Only (No Character Change)
Using the uploaded photo as the reference, keep the figure’s proportions and pose exactly as shown, and design a retail toy packaging around it: a clear blister pack on a cardboard backer card, header text reading “[NAME],” subheading “[TAGLINE],” and a punch-hole at the top for pegboard display. Add manufacturer-style small print near the bottom edge. Studio product lighting with a soft shadow beneath the packaging.
5. Pet Figurine
Using the uploaded photo as the reference, create a photorealistic 1:6 scale figurine of this pet in a natural standing or sitting pose. Matte-primed material with a sculpted fur texture rendered as a toy surface, not photographic fur. Round display base with an engraved nameplate reading “[NAME].” Soft studio lighting from the upper left, neutral background, no packaging.
6. Couple or Two-Person Figurine Set
Using the two uploaded photos as exact likeness references, create matching 1:6 scale figures of both people standing side by side, each with accurate individual facial features and hairstyles preserved. Matte-primed PVC material, consistent lighting and finish across both figures. Package together in a single window box with a shared backer reading “[NAMES].” Soft, even studio lighting, neutral background. Five fingers per hand on each figure, natural proportions.
7. No-Reference-Photo (Original Character) Figurine
Create a photorealistic 1:6 scale collectible figure of an original character: [describe appearance, outfit, and expression in 2–3 sentences]. Matte-primed PVC material with subtle seam lines, glossy finish only on the eyes and any metallic accessories. Standing dynamic pose, one leg forward. Package in a window box with a foil-stamped logo reading “[NAME].” Soft studio key light with rim light and contact shadow, neutral background. Five fingers per hand, natural proportions.
Getting the Most Out of Nano Banana Pro Specifically
A few practical habits make a real difference once you’re actually inside Gemini:
Keep packaging text short and isolated. Header and subheading text under roughly five words each, placed in quotation marks as their own instruction, renders far more reliably than a longer line folded into a descriptive sentence. If you need a longer tagline, expect to regenerate once or twice to get clean text.
Use a clear, consistent reference photo. A front-facing, well-lit photo preserves likeness far better than a blurry or heavily angled one. If you’re generating a series (multiple poses or outfits of the same figure), reuse the same reference photo each time rather than switching sources — Nano Banana Pro’s character consistency works best when the anchor image doesn’t change.
Use refinement prompts instead of starting over. If the hands are wrong or the proportions drifted, don’t rewrite the whole prompt. Reply with a targeted correction like: “Keep everything the same, but fix the hands — five fingers each, natural proportions relative to the figure’s scale.” This preserves everything that already worked and only touches the part that didn’t.
Lock in the scale early. If you’re building multiple figures meant to sit together on a shelf, state the same scale ratio in every prompt. Otherwise each generation can drift to a slightly different implied size.
Troubleshooting Common Problems
| Problem | Likely cause | Fix |
|---|---|---|
| Hands look melted or have extra fingers | No explicit hand instruction | Add “five fingers per hand, natural proportions” directly in the prompt, then use a refinement pass if it persists |
| Plastic looks waxy or too shiny overall | No material contrast specified | Specify matte finish for the body and reserve gloss only for eyes/accessories |
| Packaging text is garbled or misspelled | Too much text, or text buried mid-sentence | Keep header text under five words, isolate it in quotes as its own instruction |
| Figure looks like a bobblehead when you wanted realistic proportions | No scale specified | Add a specific ratio (1:6, 1:7, 1:12) — never leave proportion to the model’s default |
| Face doesn’t resemble the reference photo | Likeness instruction is too generic | Name the specific features to preserve: face shape, hairstyle, skin tone, distinguishing marks |
| Background looks busy or distracting | No background instruction | Specify a plain seamless background in a named neutral tone |
| Lighting looks flat and CGI-like | Only “studio lighting” was specified | Split into key light direction, rim light, and shadow, as shown in the formula above |
| Prompt gets flat-out refused | Reads as a photorealistic image of a real person rather than a stylized toy, or you’ve hit your daily quota | Emphasize “collectible figure” / “sculpted” / “toy packaging” language, simplify the prompt, and check whether you’ve hit your daily generation limit |
Nano Banana Pro vs. Other Tools
- Nano Banana Pro (Gemini 3 Pro Image) — widely reported as the strongest current option when packaging text matters, and it supports multiple reference images, which helps for couple or multi-pose figures.
- ChatGPT (GPT image generation) — a solid fallback for the basic “meme” version of the trend, but keep any on-box text to a single short line since it’s less reliable at longer text.
- Ideogram — worth trying specifically for logo-style branding on a backer card or box, since it’s built around typography accuracy, though overall photorealism tends to lag behind Nano Banana Pro.
The formula above transfers across all three — you’re mainly adjusting how much text you trust each tool to render cleanly.
A Quick Note on Using Photos
If you’re generating a figurine of yourself, that’s straightforward. If you’re using a photo of someone else — a friend, family member, or especially a child — get their permission first, and be thoughtful about where you share the result. Avoid using photos of people you don’t personally know, and don’t use this to create images of public figures in ways that could misrepresent them. It’s a fun trend, and keeping it to people who’ve actually said yes keeps it that way.
Final Thoughts
The difference between a figurine prompt that looks like a shared meme and one that looks like an actual product photo isn’t a secret trick — it’s just completeness. Name the scale. Name the material. Split the lighting into its parts. Keep packaging text short. Lock in the hands and face explicitly. Do that consistently, and the six-slot formula above will get you a clean result on the first or second try, across almost any variation you want to build.
For more prompt frameworks built the same way, see our guide to Gemini AI photo prompts for studio-quality images, which applies the same layered approach to portrait photography. If you’d rather skip the trial and error entirely, our prompt packs on Gumroad include ready-made, pre-tested versions of these templates across ChatGPT, Gemini, and Midjourney.
Frequently Asked Questions
1. Why does my AI figurine still look like a real person instead of a toy?
This usually means the material layer is missing. Add explicit instructions for matte-primed plastic or vinyl, subtle seam lines, and product-style studio lighting. Without a stated material, the model tends to default toward photorealistic skin rendering rather than a sculpted toy surface.
2. How do I stop the packaging text from coming out misspelled?
Keep header and subheading text short — ideally under five words each — and place them in quotation marks as their own clear instruction rather than embedding them in a longer sentence. Longer blocks of text are far more likely to render with typos or dropped letters.
3. What’s the best scale for a realistic-looking figure?
1:6 and 1:7 are the most common for realistic collector-style figures and tend to produce natural human proportions. 1:12 works well for smaller display pieces. For the exaggerated “chibi” look, skip scale ratios and describe the head-to-body ratio directly, such as 1:2.
4. Can I turn a pet into a figurine the same way?
Yes — use the same formula, but describe “sculpted fur texture” rather than photographic fur, since photorealistic fur tends to break the toy illusion. A simple round base with an engraved nameplate reads more convincingly than packaging for pet figurines.
5. Why does the pose look stiff compared to examples I’ve seen online?
Viral examples usually specify a pose explicitly. Add a short instruction such as “relaxed standing pose, one hand on hip” or “dynamic pose, one leg forward” rather than leaving posture unspecified.
6. Do I need a high-resolution source photo for this to work well?
A clear, well-lit, front-facing photo produces noticeably better likeness results than a blurry or heavily angled one. You don’t need a professional photo, but the model needs to clearly see facial features to preserve them accurately.
7. Can I make a figurine of two people together?
Yes — upload both reference photos and describe both figures in the same prompt, as shown in the couple/two-person variation above. Keeping the material, lighting, and scale identical for both figures is what makes the pair look like a matched set rather than two separate generations.