12 copy-paste prompts, a five-layer framework, and repair prompts for plastic skin, odd lighting and glassy eyes.
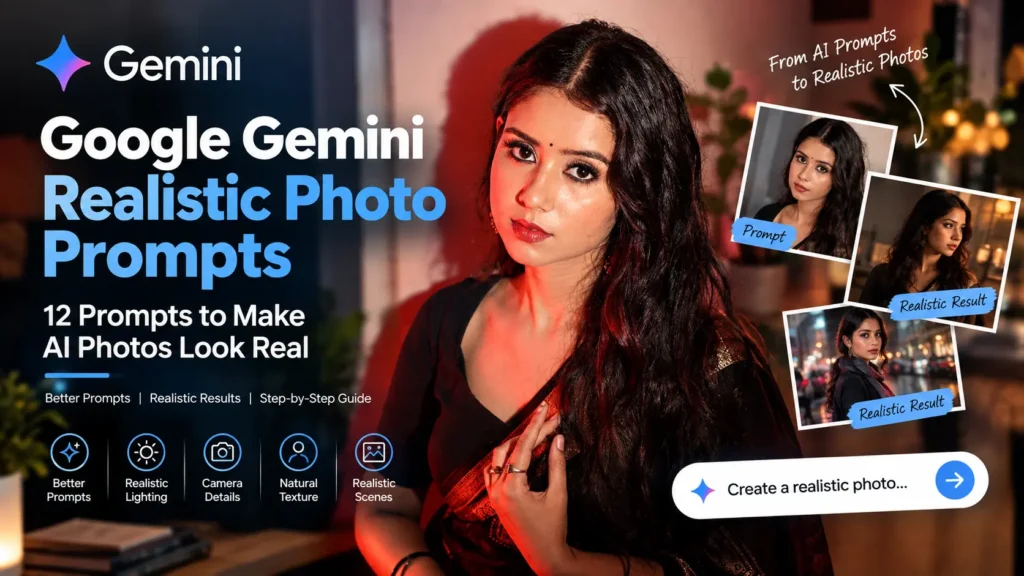
You generate a portrait in Gemini. The skin is clean, the face is symmetrical and the light is flattering, yet anyone scrolling past knows within a second that it’s AI. Nothing is technically wrong, and that is the problem. A real photograph records imperfect conditions. Default AI output shows an ideal.
This guide gives you twelve copy-paste prompts, then explains the logic so you can write your own. You’ll also get a way to diagnose what makes a specific image look fake, and short repair prompts that fix one flaw without regenerating the whole picture.
Before you start
Open with the intent. Start your prompt with a word such as create, generate or draw, then describe the subject, what they are doing and the setting. Google recommends giving Gemini a detailed visual description rather than relying on a short list of keywords.
Know which image model Gemini is using. Gemini Apps currently use Nano Banana 2 for image generation when the Gemini model is set to Flash or Pro. If you use Flash-Lite, Gemini uses Nano Banana 2 Lite, which is optimised for speed and basic image generation rather than multiple reference images or repeated edits. Paid Google AI subscribers can also use Nano Banana Pro to redo an image when they want additional detail and more precise creative control.
Write a description, not a keyword pile. Google’s current image-generation guidance recommends describing the image in detail, including the subject, action, setting and visual style. For realistic photography, add useful photographic information such as the camera or lens perspective, lighting, composition and surface detail instead of stacking words such as “8K”, “ultra-detailed” and “hyper-realistic.”
The realism template
Use this when none of the prompts below fit your scene:
Create a photograph of [who: age, one specific physical detail] [doing a specific action] at [a real, specific place]. Light: [one source, its direction, its quality, time of day]. Camera: [phone / 35mm / 50mm / flash compact], [distance and angle]. Skin and detail: [texture suited to their age and the light]. Moment: [what they’re in the middle of, where they’re looking]. Scene: [two or three lived-in details]. Unretouched, like an unedited capture. Aspect ratio [4:5].
Add an aspect ratio at the end of any prompt: 4:5 for portraits, 9:16 for stories, 3:2 for documentary frames.
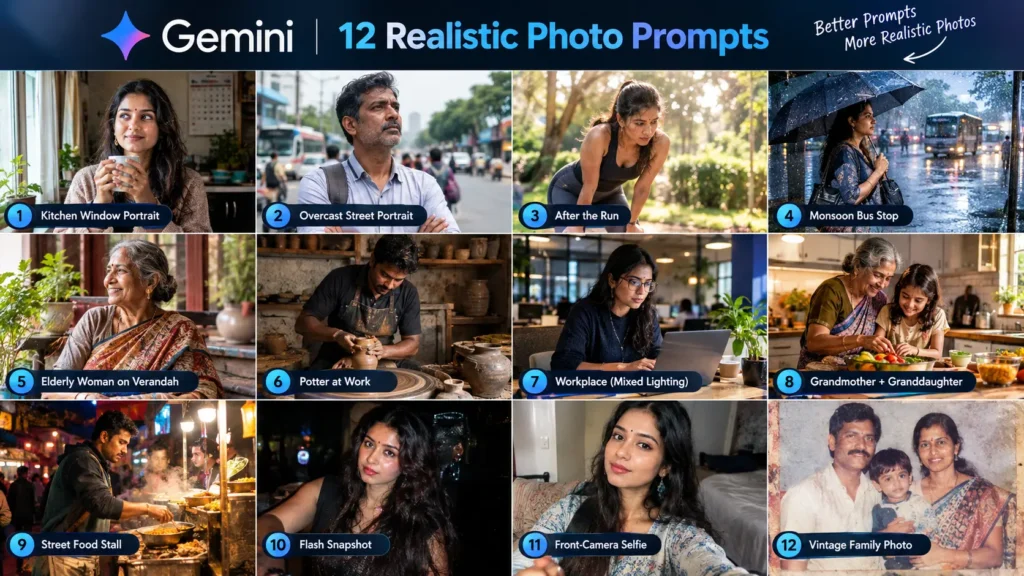
12 Realistic Google Gemini photo prompts
Swap the subject freely. The prompts work for women, men and older people, because the realism comes from the light, lens and moment, not the person.
Everyday, natural light
1. Kitchen window portrait
Create a candid photograph of a woman in her early 30s standing at a kitchen window holding a steel tumbler of tea, looking slightly off-camera as if someone just spoke to her. Soft, cool morning light comes from the window on her left, and the far side of her face falls into gentle shadow. Her skin has natural variation: faint redness around the nose, small pores on the cheeks, fine lines when she smiles, no makeup. A few loose strands of hair have escaped her bun. Shot on a phone camera, slightly soft at the edges, no retouching. The kitchen is lived-in: a dish rack, a wall calendar, a crooked curtain.
Why it works: one light source, a named direction, and skin described by feature rather than by “realistic”.
2. Overcast street portrait
Create a street portrait of a man in his late 40s waiting at a crossing on an overcast afternoon, arms folded, looking into the middle distance. Flat daylight from a white sky means no hard shadows, which shows skin texture: sun-worn cheeks, uneven tone around the eyes, grey at the temples, a small scar on the chin. He wears a creased cotton shirt with a bag strap pulling at the collar. Shot on a 50mm lens at eye level, with traffic and pedestrians softly out of focus behind him.
Why it works: flat light is honest light. It suits texture-heavy faces better than dramatic light.
3. After the run
Create a photograph of a woman in her late 20s catching her breath after a morning run in a city park, hands on her knees, looking at the ground. Low direct sun from behind creates a bright rim on her hair and slightly blown highlights. Her face is flushed with a sheen of sweat, damp hair stuck to her temple, and her top is darker at the collar. Shot from a few metres away on a 70mm lens, a passer-by out of focus behind her, a hint of lens flare. Unstyled, no makeup.
Why it works: physical effort produces imperfections the model doesn’t have to invent.
4. Monsoon bus stop
Create a photograph of a woman in her late 30s waiting at a bus stop in monsoon rain, holding a slightly bent umbrella with her bag tucked under her arm. Grey, diffused light with wet reflections on the road behind her. The shoulders of her kurta are damp and a few hairs are stuck to her forehead. She looks tired but patient, watching the road for the bus. Shot on a phone at wide-angle, a raindrop blur at the edge of the lens, muted cool colours.
Why it works: weather gives the image a reason for every imperfection in it.
Documentary and workplace
5. Verandah, late afternoon
Create a documentary-style portrait of an elderly woman in a faded cotton saree sitting on a verandah step in late-afternoon light, sorting lentils on a steel plate. Warm low sun from the side catches the fine hair on her cheek and the texture of her hands. Deep wrinkles, age spots, reading glasses on a cord around her neck. She glances up mid-task, not posing, expression neutral and attentive. Shot on a 35mm lens from a short distance, natural grain, colours slightly muted like an unedited photo.
6. The potter
Create an environmental portrait of a potter in his 60s at his wheel, hands wet with clay, glancing at the camera while the wheel keeps turning. Soft daylight from a large open doorway on his left, dust floating in the beam, clay splatter on his apron and forearms. Weathered skin, clay dried in the creases of his knuckles. Shot on a 35mm lens at chest height, shelves of unglazed pots slightly out of focus behind him, mild grain.
7. Mixed-light office
Create a workplace portrait of a man in his 50s at his desk, turned toward the camera as if someone called his name, holding reading glasses in one hand. Mixed lighting: cool window light on one side and warm overhead tubes above, so his skin shows a slightly uneven colour temperature. Visible skin texture, fine forehead lines, a slightly uneven collar, a lanyard, a cluttered desk with papers and a half-finished coffee. Shot on a 35mm lens with most of the frame reasonably sharp. No studio polish.
Why it works: real offices rarely have clean light, and mixed light is a reliable realism signal.
8. Two generations in a kitchen
Create a candid photograph of an elderly woman and her adult granddaughter cooking together in a small home kitchen. The grandmother is showing how to roll dough while the granddaughter laughs, with flour on her forearm. Warm light from an overhead bulb mixes with cool daylight from a small window, and a little steam hangs in the air. Each face shows texture suited to her age. Shot on a 28mm lens from across the counter, slightly tilted, with clutter in the foreground.
Phone, flash and film looks
9. Street stall at dusk, phone night mode
Create a photograph of a man in his 40s handing a paper plate across a street-food stall counter at dusk, mid-conversation, mouth slightly open. The only light is a bare bulb above the stall and the glow of the cooking fire, so his face is lit unevenly: orange highlights on one side, deep shadow on the other. Visible stubble, an oil sheen on his forehead, a sweat-darkened collar. Shot handheld on a smartphone in night mode: slight grain in the shadows, a little motion softness on his hand, background lights blurred unevenly. Framing slightly off-centre.
10. On-camera flash snapshot
Create a snapshot of three friends laughing outside a restaurant at night, taken with a compact film camera and direct on-camera flash. The flash makes faces slightly overexposed and flat, with hard shadows on the wall behind them. One person is half cut off at the frame edge and another is mid-blink. Visible film grain, a warm colour cast, the background falling to near-black. Unposed, like a photo from a friend’s camera roll.
11. Front-camera selfie
Create a front-camera selfie of a young man in his early 20s on a railway platform, phone held at arm’s length slightly above eye level. The wide-angle lens exaggerates his forehead and nose a little, the framing is imperfect with the top of his head just clipped, and a train is blurred behind him. Harsh midday light from the side, a slight squint, a real smile with uneven teeth, small acne marks, stubble. Background people are ordinary and unposed. Phone-style processing: a little over-sharpened, highlights slightly clipped.
12. Scanned family print, late 1990s
Create a scan of a 4×6 print from the late 1990s of a family lunch on a rooftop terrace: an older man carving a watermelon, a woman laughing while covering her plate, a young man reaching past her for a slice. Harsh noon sun plus a cheap point-and-shoot flash fill, faded reds, a faint cyan cast in the shadows, soft focus, dust specks and a white crease near one corner. Framing slightly crooked, someone’s shoulder blocking the left edge.
The five realism layers
Notice how the prompts above are built. Each one makes five decisions, and realism comes from making them consistently.
1. Light. Name one main source, its direction and its quality. Real scenes have a light source you could point to. Mixed sources, like the office prompt, are fine as long as you say what they are. For more on this layer, see Lighting in AI Art.
2. Lens. Name the device that “took” the photo and how close it was. This is the most underused layer. A phone, a 35mm film compact with flash and a 50mm street lens each have their own natural flaws: phone over-sharpening, film grain, flash fall-off. When you name the device, the flaws come with it, and they read as authentic.
3. Skin and subject. Describe texture in proportion to age and light distance. Specific beats general: “a small scar on the chin” does more than “detailed skin”. Overdoing it backfires, because a face with pores everywhere looks generated in a different way.
4. Scene. Give the place two or three lived-in details with a reason to exist: a dish rack, a lanyard, a crooked curtain. Backgrounds that are too tidy or too blurred are one of the quickest tells.
5. Moment. Real photographs catch someone in the middle of something. Give the subject an action and a gaze that isn’t at the camera. “Looking at the camera, smiling” produces the posed, stock-photo feel.
Then run a conflict audit. Before you generate, re-read the prompt for instructions that can’t coexist: “golden hour” with “soft studio light”, “candid” with “perfectly posed”, “phone selfie” with “85mm portrait lens” (selfie cameras are wide-angle), “night” with “harsh sun”. Conflicting instructions are a common cause of images that look wrong without an obvious reason.
A note on skin tones and local settings. Many prompt libraries lean on words like “glowing”, “flawless” and “fair”, which push every skin tone toward the retouched look. Instead, state the skin tone and undertone plainly, and describe the light hitting it, such as a soft highlight on the cheekbone or shadow falling under the jaw. For Indian settings, real materials help more than adjectives: steel tumblers, cotton with visible creasing, plastic chairs, hand-painted signs, overhead wires.
Diagnose what’s making your image look fake
Researchers who build AI-image detectors check for the same things a viewer’s eye catches without naming them. Common giveaways include eye reflections that look too uniform, skin that’s overly smooth without natural variation, and hair strands lacking natural definition. Another is camera optics that behave impossibly, such as sharpness in depth planes that shouldn’t be equally sharp. Find your tell below, then use the repair prompt.
How to repair. Gemini supports conversational image editing, so you can generate an image and then ask it to make targeted changes. Start with one correction at a time—for example, fix the lighting, skin texture or depth of field—while explicitly asking Gemini to preserve the subject and composition.
- Airbrushed skin. With no mention of imperfection, the model tends to fill the gap with the most flattering version.
Keep the same person, pose, clothing and background. Change only the skin: show natural texture suited to her age, small pores across the nose and cheeks, slight unevenness in tone, fine lines around the eyes, and a faint shine on the forehead. Remove any smoothing or glow.
2. Light that makes no sense. Symptoms are shadows falling in different directions and a face that glows regardless of the room.
Keep the subject and composition identical. Relight the scene with a single soft window light from the left at mid-morning. Shadows fall to the right, the far side of the face is one step darker, and the background is lit by the same source.
Know it in more detail: Lighting in AI Art – The One Prompt Skill That Changes Everything
3. Glassy eyes. Catchlights should match the light source, not appear as two identical white dots.
Keep everything else unchanged. Adjust the eyes: one soft rectangular catchlight matching the window on the left, natural iris texture, slight redness in the whites, and a gaze just off-camera.
4. Depth of field that doesn’t behave. Everything sharp, or a cut-out edge around the hair, gives it away.
Keep the subject unchanged. Rework the depth of field to match a 50mm lens at f/2.8: eyes sharp, ears and shoulders beginning to soften, background blur increasing gradually with distance, no cut-out edge around the hair.
5. A scene that’s too perfect. Perfect symmetry, pressed clothes and a tidy background suggest a render.
Keep the person and framing. Make the scene look lived-in: slightly creased clothing, one strand of hair out of place, a scuffed wall, everyday clutter behind them, and a small asymmetry in the smile. Nothing styled or staged.
6. Hair and hands. Helmet-smooth hair outlines and stiff hands are common.
Keep everything else identical. Fix the hair: natural parting, individual flyaway strands, some hair crossing the forehead, no smooth outline. Relax the hands into a natural, unposed position.
7. The over-processed look. Saturated colour and glossy clarity read as “AI” before anything else does.
Keep the image identical but change the colour treatment to match an unedited phone photo: slightly muted colours, white balance that suits the light source, gentle contrast, minor highlight clipping, light noise in the shadows. Remove any HDR glow or beauty filter.
What to stop writing
Quality-stacking words. “8K, masterpiece, ultra-detailed, HDR, hyper-realistic” don’t describe a photograph. One 2026 realism test reported that specific photographic direction worked better than piling on generic detail terms. The single word “photorealistic” is fine as an anchor, since Google’s own template uses it, but it can’t do the work on its own.
Negative-prompt lists. Lists like “no plastic skin, no airbrushing, no CGI” are common on prompt sites, but the Gemini app is conversational and has no separate negative-prompt field. Google’s guidance is to describe the wanted scene positively, so write “visible pores and uneven tone” instead of “no smooth skin”.
“Flawless”, “perfect”, “beautiful”. These directly request the retouched look you’re trying to avoid.
Which model, and a workflow that saves quota
For most realistic photo experiments, Nano Banana 2 is the practical starting point. Google describes it as the general-purpose image model that balances speed, image quality, world knowledge, instruction following and reliable text rendering. It also supports multiple reference images and iterative image editing.
If speed is your priority, Nano Banana 2 Lite is designed for faster, lower-cost image generation. Google notes that it isn’t designed for multiple image references or multiple sequential edits, so it is better suited to quick ideas than a long refinement workflow.
For more demanding work, Nano Banana Pro is the higher-end option. In Gemini Apps, paid subscribers can use Redo with Pro after generating an image with Nano Banana 2 or Nano Banana 2 Lite. Google positions Pro for additional detail, complex instructions and more precise creative control.
A practical workflow is therefore:
- Start with Nano Banana 2 and get the composition, lighting and subject right.
- Refine the image conversationally instead of regenerating it for every small problem.
- Use Redo with Pro when the final image needs additional detail or more precise control and the option is available on your plan.
- Keep your strongest version rather than repeatedly regenerating small variations.
Gemini’s image tools support conversational editing, including changing an image you generated or uploading an existing image and asking Gemini to modify it.
Resolution depends on how you access Gemini. In Gemini Apps, Google currently says generated images can be downloaded at 2K resolution with a Google AI plan and 1K without one. The Gemini API has different model capabilities: Nano Banana 2 supports generation up to 4K, while Nano Banana Pro is designed for professional 4K visual production.
Because Google’s Gemini plans and usage limits can change, check your current Gemini account for the quota and features available to you rather than relying on a fixed number in this guide.
Realism is a craft, not a disguise
Make believable images without presenting AI-generated work as a real photograph when that distinction matters. Use fictional or consenting subjects, and be transparent about AI-generated imagery when an audience could reasonably assume that a camera captured the scene.
Gemini-generated images include Google’s SynthID watermark technology. Gemini can also be used to check whether an image or other media contains a detectable SynthID watermark. If Gemini detects SynthID, Google says that all or part of the image was created or edited by Google’s AI models. If no SynthID watermark is detected, that does not prove the image is a real photograph; it may simply mean that Google’s watermark was not detected or that another AI system was used.
So treat realism as a quality goal: make the lighting, texture, camera behaviour and environment believable rather than trying to make AI-generated work impossible to identify.
Frequently Asked Questions
1. Why do my Gemini photos look plastic?
Usually the prompt never mentions imperfection, so the model fills the gap with the most flattering version. Describe skin texture by feature, name one light source, and give the subject a moment instead of a pose.
2. Is “photorealistic” enough for a realistic Gemini photo?
It’s a useful anchor, not a recipe. Pair it with a lens, a light source and specific detail, as in the template above.
3. Should I use negative prompts in Gemini?
Describe what you want instead. Positive wording like “an empty street” works better than “no cars”, and the same applies to skin, light and backgrounds.
4. Nano Banana 2 or Nano Banana Pro for realistic photos?
For most realistic photo generation, start with Nano Banana 2, which Google positions as its general-purpose image model for image generation and editing. If you have a Google AI plan and want additional detail or more precise control, you can use Redo with Pro to regenerate an image with Nano Banana Pro. Nano Banana 2 Lite is the speed-focused option for simpler image generation.
5. Do these prompts work for any subject?
Yes. Change the subject, keep the other layers, and run the conflict audit before you generate.
6. Can I make Gemini images undetectable as AI?
That isn’t the goal here, and Google’s SynthID watermark stays invisible in the image. Aim for believable and label your work honestly.